-
Empty cart
No products in the cart.
Return to Shop
Hello everyone, and welcome! I have a website and an Etsy store where I sell photo overlays, and I often receive questions about How to Use Photo Overlays. So today, we’ll look at overlays with a black background, beauty overlays, overlays with a transparent background, and I’ll teach you how to add them to your photos.
How to Use Photo Overlays with black backgrounds
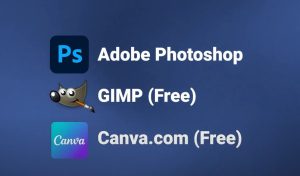
To work with overlays, you’ll need any graphic editor that supports layer work, such as Adobe Photoshop, Gimp, or Canva.com (these are free editors). I will show you how to work with overlays in Adobe Photoshop, but if you’re interested in any other editor, please let me know in the comments, and I will definitely make a video for you.
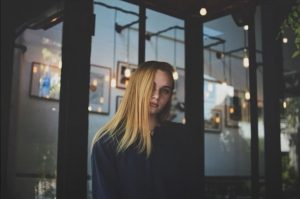
Here’s a photo of a beautiful girl. First, let’s discuss the basic tools you’ll need, starting with JPG overlays, which have a dark or black background.
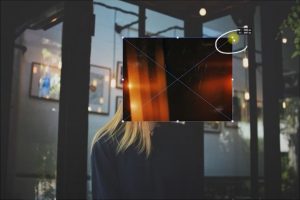
Recently, I added new vintage LOMO overlays to my Etsy shop and website. Simply drag the overlay you like onto the photo. To enlarge or reduce it, pull on the white square at the corner of the image. If the aspect ratio changes when you zoom, you can lock it by enabling the lock icon, so the overlay neither stretches nor shrinks. Once everything is set, just double-click to place it.
If you don’t like how the overlay fits on the photo, you can rotate it and change its angle. Go to Edit -> Transform -> Free Transform. You can scale and rotate, etc.
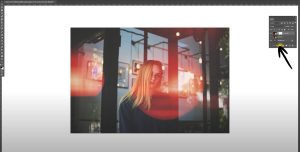
Let’s try applying another effect. To mirror it, it should be in transform mode, as I showed earlier, then right-click on the overlay and select flip horizontal or flip vertical. Suppose you like the light on the left, but not the light in the center of the photo. To change this, select the layer with your overlay and click on the mask. Now take a soft brush and black color to paint over the unwanted area.
You can layer multiple overlays to create new interesting effects. For instance, I want to keep the glow on this side, but there is a seam on the left where the overlay ends, so I’ll just turn on the mask again and softly brush over this seam.
Gradient and light overlays are used just like those with a black background; you switch to the screen mode.
How to Use Garlands Photo Overlays
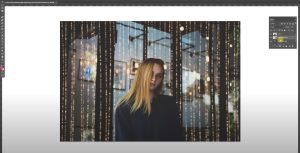
Some of my garland overlays have no background and can be layered without changing the blending mode, but I recommend switching to screen mode as it makes them look more realistic and radiant. This photo isn’t quite suitable for garlands, but for demonstration purposes, it will do.

Let’s try using such a garland. The garland covers the girl’s face, and we want to place it in the background. In that case, we just need to separate the girl from the background. Select the layer with the girl and go to Select -> Subject. The photo is too dark at the bottom, and the program can’t define the edge, so I’ll just add to the selection with the polygonal lasso tool. Hold shift to start your point so the selection doesn’t reset and simply select what should have been selected. The end point should always connect with the starting point. That’s it. Right-click on the girl and copy to a new layer. Now, place our garland layer underneath the layer with the girl. That’s it. So simple!
If you think the garland isn’t bright enough, you can simply duplicate the layer with it again and again. This way, the glow will become stronger. I also have a set of scratch and wear overlays. They also require the screen blending mode, but if the picture becomes too bright, you can duplicate your overlay and select the soft light blending mode and slightly reduce the opacity. This way, the effect will intensify, and the picture will not look so washed out. They are also easy to layer on top of each other.
How to Use Sky
Now, I want to show you how to replace the sky in a photo. All you need to do is remove the sky from the photo. Go to Select -> Sky, and the program will automatically select the sky. Then just duplicate the layer and click on the mask, place our sky overlay. Click on the mask with the left mouse button and, holding it, drag it over our sky. To freely move the sky, disconnect the image from the mask by clicking on the clip. Now you can select the layer with the sky and move it as needed. If the sky does not match the colors of the photo, you can either make a color correction of the sky or a color correction of your photo using the filter camera raw.
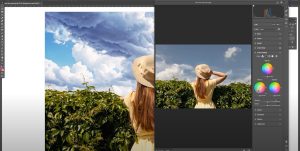
By the way, you can always click on the mask with ctrl held down to reselect the sky. Then you can invert the selected area and copy the girl and bushes if you prefer to simply place the sky under the layer with the girl.
I want to show you a simple way to fix the colors of a photo, quickly and easily. Right-click on the layer with the girl needed color, and change the blending mode to soft light. This way, you can quickly add a color tone to your photo.
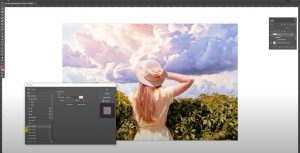
Here’s another example. Take this photo. Again, select the sky, and this time I’ll just copy the layer with the girl to a new layer and place the sky photo underneath her. I don’t like the join between the sky and the forest, so I’ll simply create a mask on the layer with the girl and with a black brush, I’ll touch up some parts. I’ll go back into the blending options, and this time, I’ll enable a dark blue color.

Mixing Multiple Effects
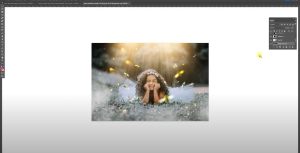
Now, I want to show you how you can use several different overlays to create stunning photos. Here’s a wonderful photo of a girl. I want to add some fireflies around her. We place our fireflies and change the blending mode to screen. Then I want to add a bit of sunlight from above, although they are in PNG format, I still change the blending mode to screen, otherwise, I can’t get a realistic effect. In normal mode, you would see how the yellow color covers the girl creating a misty effect, which we do not want. And add a few more sunrays. Now, I want to add some mist. This is a collection of creative, unrealistic mist. Now, holding shift, I simply select all the layers, right-click, and merge them. A little adjustment is left. Go to Image -> Adjustments -> Curves. Just tweak a little, adding contrast to the midtones. This is how magical the photo turns out.
How to Use Photo Overlays – Flowers and Plants
I also have many collections of overlays with different plants and flowers. Now I’ll show you how to use them. It’s very easy since you can just drag them onto the photo, change the size, and that’s all. You don’t need to change the blending mode. If you want to place the flowers behind the girl, you simply need to select her and copy to a new layer, and then you can place your flowers under the layer with the girl. I’ll show you another example.

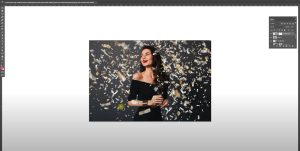
How to Use Photo Overlays – Confetti
Confetti is also easy to apply and does not require a change in the color mode if they are PNG confetti. However, all photos are different, and it’s impossible to predict where the face will be, so you simply place the confetti over the photo then turn on the mask and with a black brush erase the extra bits where you think necessary. Just like that.
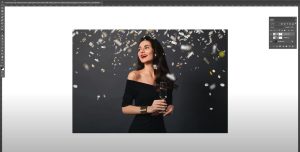
If you want the confetti to be plentiful on your photo, you can just copy the girl to a new layer, all as I showed earlier, and place the confetti under the layer with the girl, then a bit less confetti above the layer with the girl to create a festive effect.
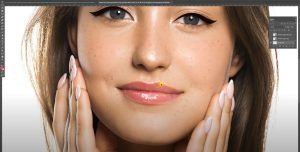
How to Use Photo Overlays – Beauty
I also have various overlays for makeup, including separate eyebrows, eyelashes, or a makeup set that has a little of everything. They are in PNG format, but require sizing as everyone has different eyes, lips, etc. You simply place, for example, the eyelashes on your photo, change the size. For the other eye, hold alt and drag the layer with the eyelashes to duplicate it, then edit -> free transform, right-click on the eyelashes and select flip horizontal. Then go to edit -> transform -> warp and just adjust them to shape. If you don’t like some part, you can again turn on the mask and erase the excess.

Let’s add some shadows. I have these with glitter. You can leave them as is or change the blending mode, for example to hard light, to experiment and get different effects. I’ll do the same with the eyeliners but this time I’ll set their blending mode to multiply so the eyelashes can be seen through them. The blush basically fits in shape, but I’ll reduce its opacity because it’s too bright for this photo. Freckles can be used with the multiply mode and just erase the extras. I always do this using a mask because if needed, you can always go back with a white brush. Highlights can be applied in both normal and screen modes.

For these shadows, I want to use hard light to create a glossy effect. That’s about it.
I hope my video was informative and helpful, and now it will be easier for you to understand how to use different types of overlays.
If you liked this video, please like and subscribe to the channel.
And if you are looking for interesting overlays for your photos, be sure to check out our website.
Good luck, and see you next time!